


Alright foxes, let’s dig into the most important part of a sleek online store. (Arguably. But fight us on it.) 😉
Image optimization.
Properly optimized images are the unsung heroes of the most badass websites out there. Especially in e-commerce, where product imagery is EVERYTHING. And we mean everything. Talk to our brands, we’ve dragged this point home.
Image size is one of the top factors that affects site speed, page load time, customer experience, and most importantly — Google’s stamp of approval. If you’re not convinced, you should be. Even if you’re already convinced, you’re probably not convinced enough.
So keep reading.
To make it simple: Google is only going to rank you well if they like your page (and Google is one tough little blighter to please, let me tell you that). Images are a large part of how high you rank because they directly impact your page load time. The larger the files, the longer your page will take to load.
No one wants a dragging page. You’ll have customers dropping like flies.
Here’s everything you need to master the art of image optimization.
1. Properly name your files
This is an easy win for getting big SEO points. Search engines crawl all text on your page, and they also look through your images as well. They check your file names and your descriptive text as well. Image names are just as important to Google as product descriptions.
Making your images searchable drives organic traffic to your page. After all, what’s the point of having amazing photos if no one can find them?
Choose the right file name
Google will never forgive you for keeping the file name right off the back of your camera.
IMG30202.JPG
That’s a no go.
Name your files descriptively, with the image subject in mind. We know this can be time consuming, especially when you’re working with hundreds of product photos, so here are a few tips.
Bulk file renaming
Use searchable terms like your brand name, product descriptor, product category, etc.
1. Highlight all images you want to rename
2. Right Click > Rename…
3. Add new name (e.g. mimskii-ceramics-bowl-shopfox-1.jpg)
4. Save

2. Compress your images
Don’t compromise on the compression. (Write that down.)
And here’s the thing, you’ve got to be ruthless, fam. Or make it a competition. Whatever floats your boat. Just get that puppy as small as possible.
How small is small, you ask?
Under 80 KB.
You read that right. We know it’s not always easy. But keep pushing. It will be worth it.
TOP DOG TIPS
File Size:
The golden size standard for product photos is a maximum of 70 – 150 KB.
For full-screen images it’s a maximum of 250 – 350 KB.
Dimensions:
Product images: We typically make it a max width of 800px and height of 1200px.
Full screen feature images: We’d give it a maximum 2400px in width
How to compress using Photoshop
Photoshop is definitely the preferred method for compressing photos without sacrificing image quality. Here are two methods, one for single files and one for many photos at once.
Method 1 – Photoshop’s ‘Save for Web’ Function
1. Open your image in Photoshop.
2. File > Export > Save for Web (or you can use the shortcut SHIFT + Option + Command + S)
3. Edit the image dimensions. For product images, we typically resize to 800px wide and let the height automatically convert.
4. Set the JPEG ‘Quality’ slider to 60 (or lower if your image quality can afford it). Watch your file size decrease until you are happy and the image quality is still acceptable.
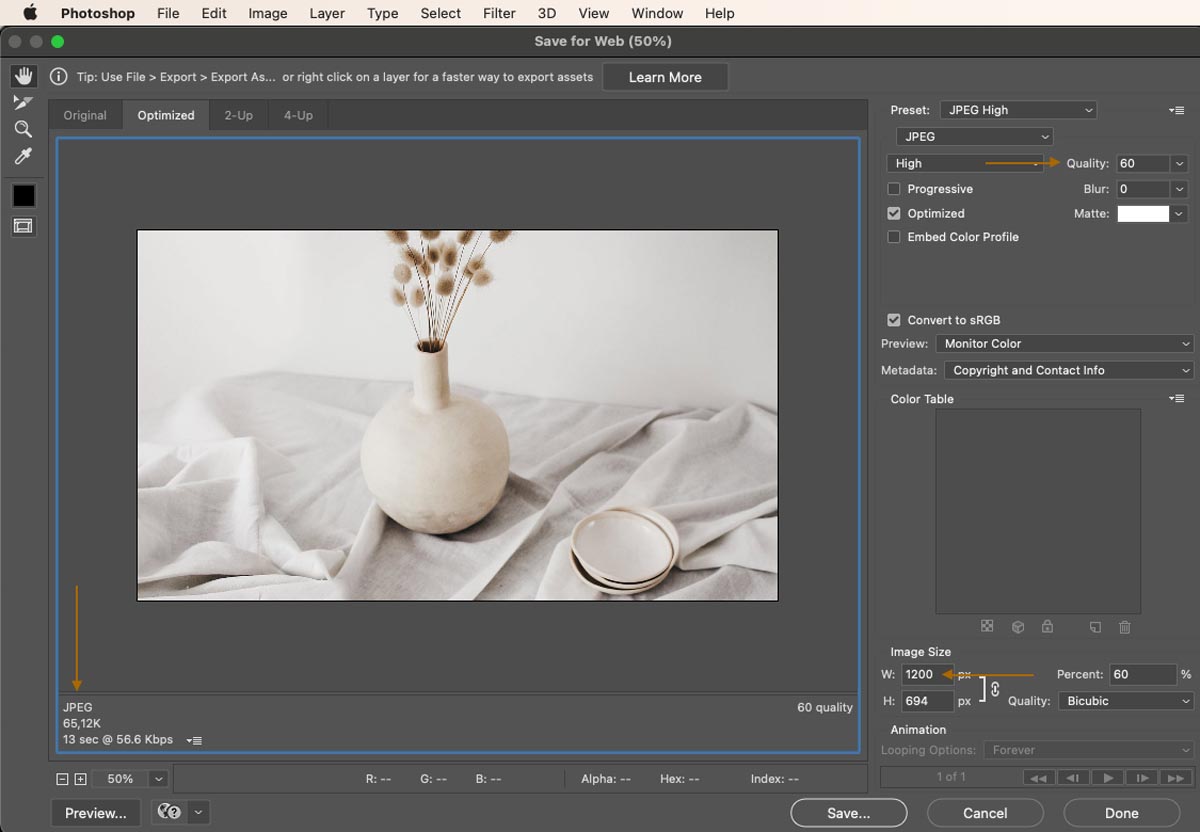
5. Save
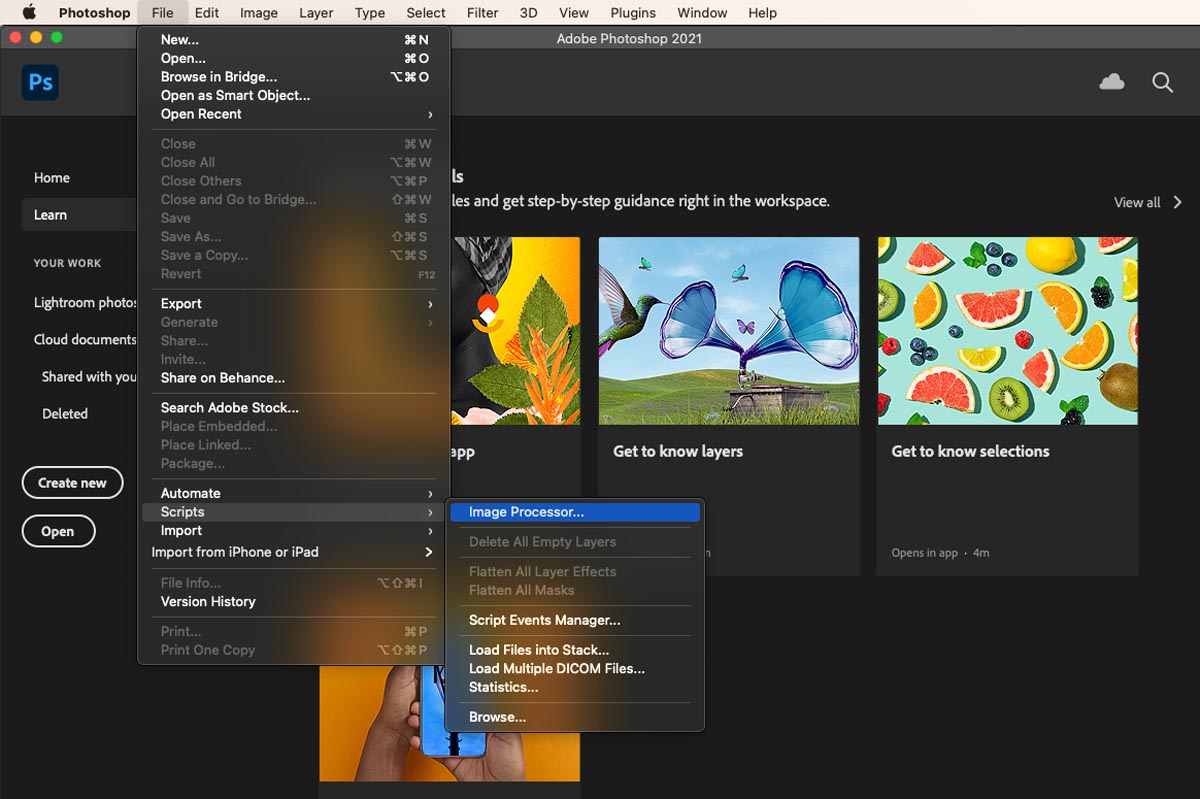
Method 2 – Compress a whole folder of images at once!
We’ll let you in on a little secret: this tool is literally a well-kept Photoshop secret! But it will be your new best friend.
1. In Photoshop choose File > Scripts > Image Processor
2. Select your folder prepared to optimize
3. Choose the max width and height*
4. Choose the quality (Between 4-6 is standard. You can test a few runs to see which has the best quality + smallest file size).
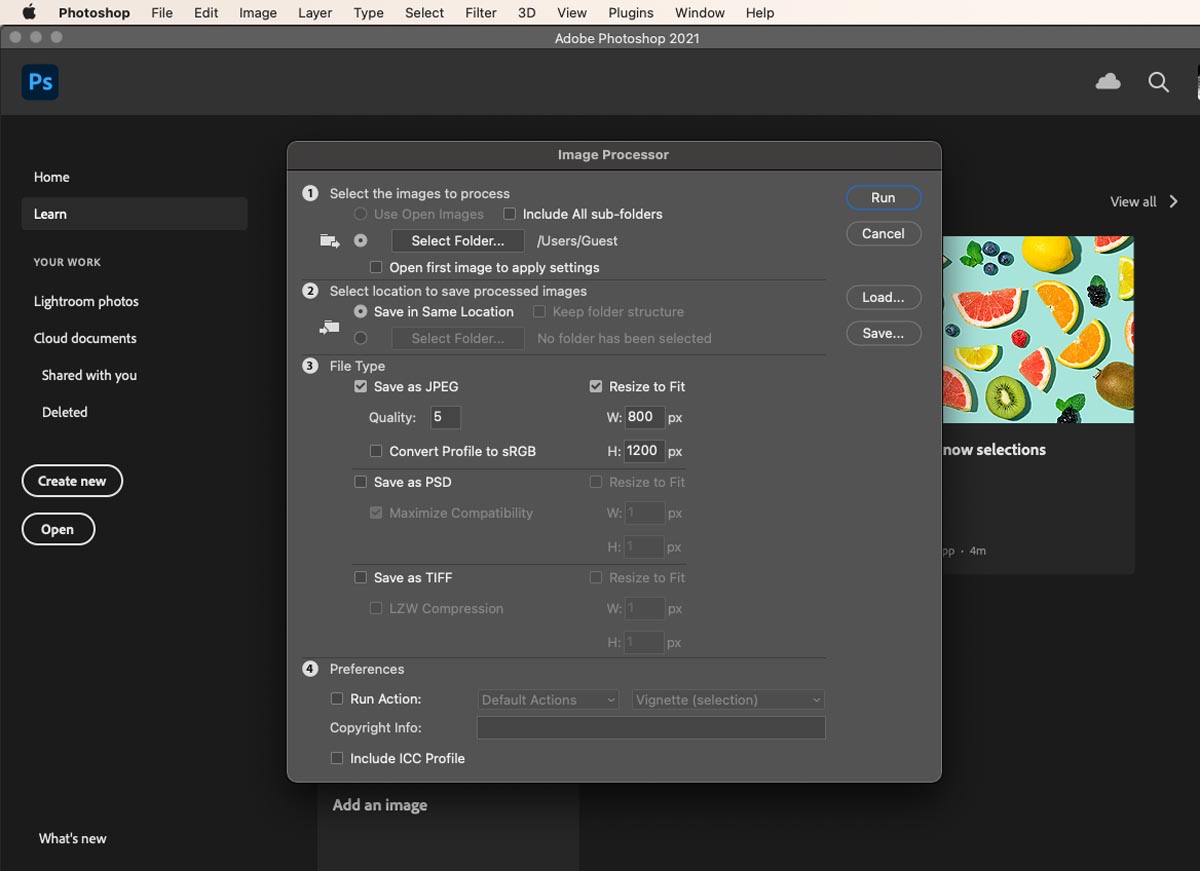
5. Run Script
6. Find your compressed images in a folder titled JPEG inside your original folder.
7. Thank us later
Compress without Photoshop
If you don’t have photoshop, here are some free Image Compression tools. Take a look, experiment with a few tools, and see which one works best for you. (We’d love to know as well!)
Photoshop alternatives to compress images:
3. Add Alt Text
Last but not least. You’ve already optimised your image file name in the first step, but don’t forget to use alternative text. Alt text can be longer than a file name and include additional keywords. Alt text allows Google to still index the images on page, even if a user’s browser prevents images from loading properly.
Get more descriptive with your alternative text. Instead of mimskii-ceramics-bowl-shopfox-1.jpg — you can add ‘Handmade ceramic bowls and vases by Mimskii.’
High five our tutorial skills if you’re now an Image Optimizing Pro. If you still have questions, give us a shout.
That’s it fam. Happy optimizing.
XX